Getting Started
First Login & KYC
After your first sign-in, complete Know Your Customer (KYC) so Dymora can verify your business and pay commissions. Until KYC is approved, the dashboard shows a prominent banner.
URL: /dymora/kyc
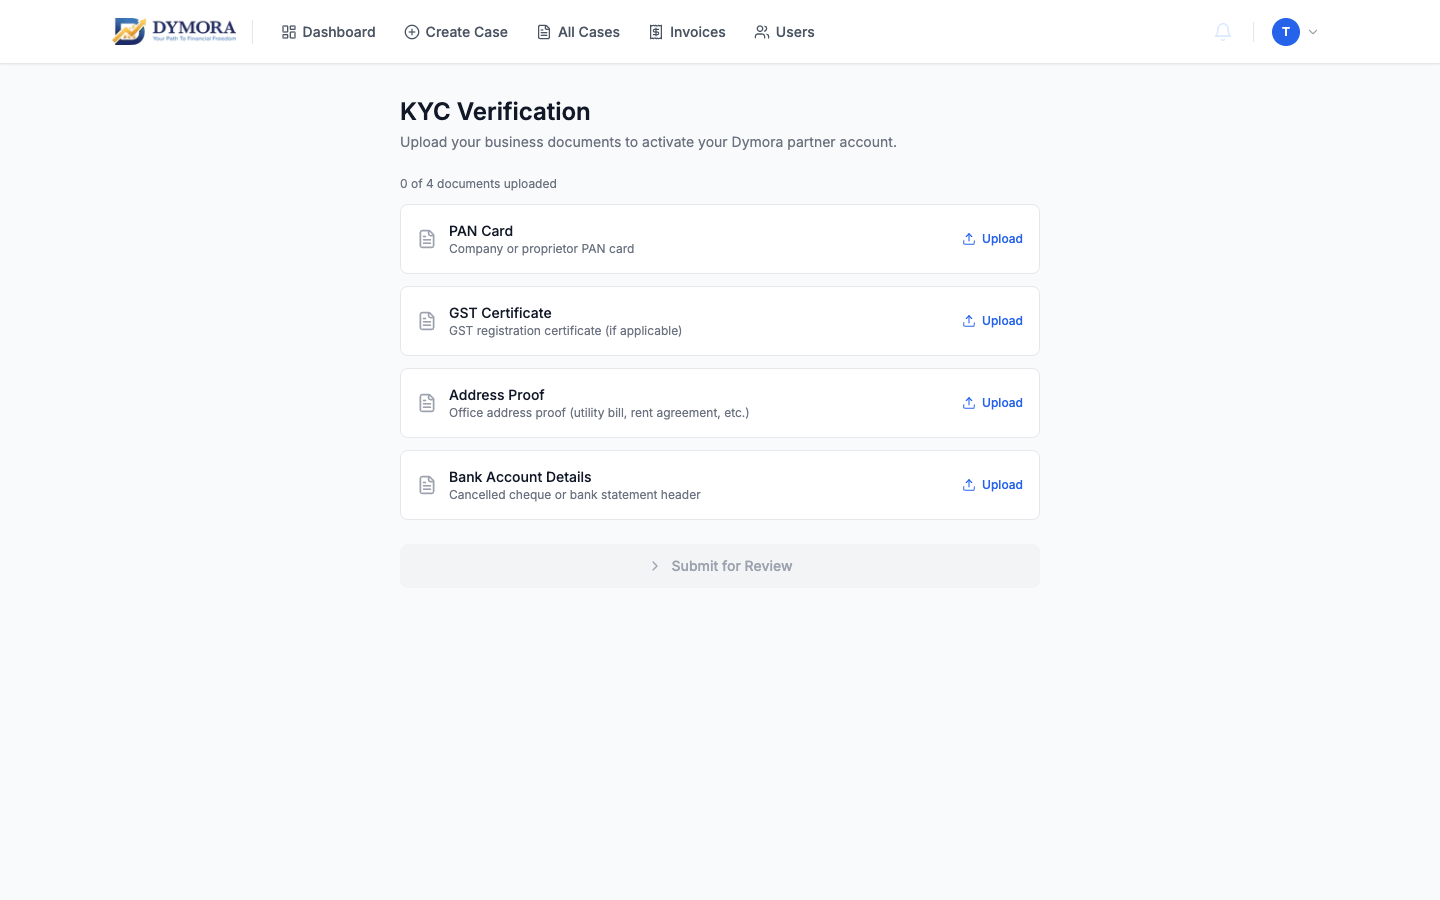
KYC page - complete document upload here
KYC statuses
| Status | Meaning | Your action |
|---|---|---|
| not_submitted | KYC not started | Upload documents and submit |
| submitted | Under Dymora review | Wait; check dashboard banner |
| approved | Verified | No banner; full portal use |
| rejected | Issue with documents | Re-upload flagged items and resubmit |
Required documents
| Document | Description |
|---|---|
| PAN Card | Company or proprietor PAN |
| GST Certificate | If applicable |
| Address Proof | Office address (utility bill, rent agreement, etc.) |
| Bank Account Details | Cancelled cheque or bank statement header |
Accepted formats: JPG, PNG, PDF
Step-by-step: Complete KYC
- 1Sign in and open the KYC banner on the dashboard, or go to /dymora/kyc.
- 2For each document type, click Upload and select a file.
- 3Wait for each upload to finish (per-document status shown).
- 4When all required documents are uploaded, click Submit for review.
- 5Status changes to submitted - Dymora reviews offline.
- 6When approved, the dashboard banner disappears.
- 7If rejected, read notes on affected documents, replace files, and submit again.
Bank & GST details
Commission payouts also need accurate bank and GST details. After KYC, update these under Settings → Bank & GST section.